By Leigh Peteh
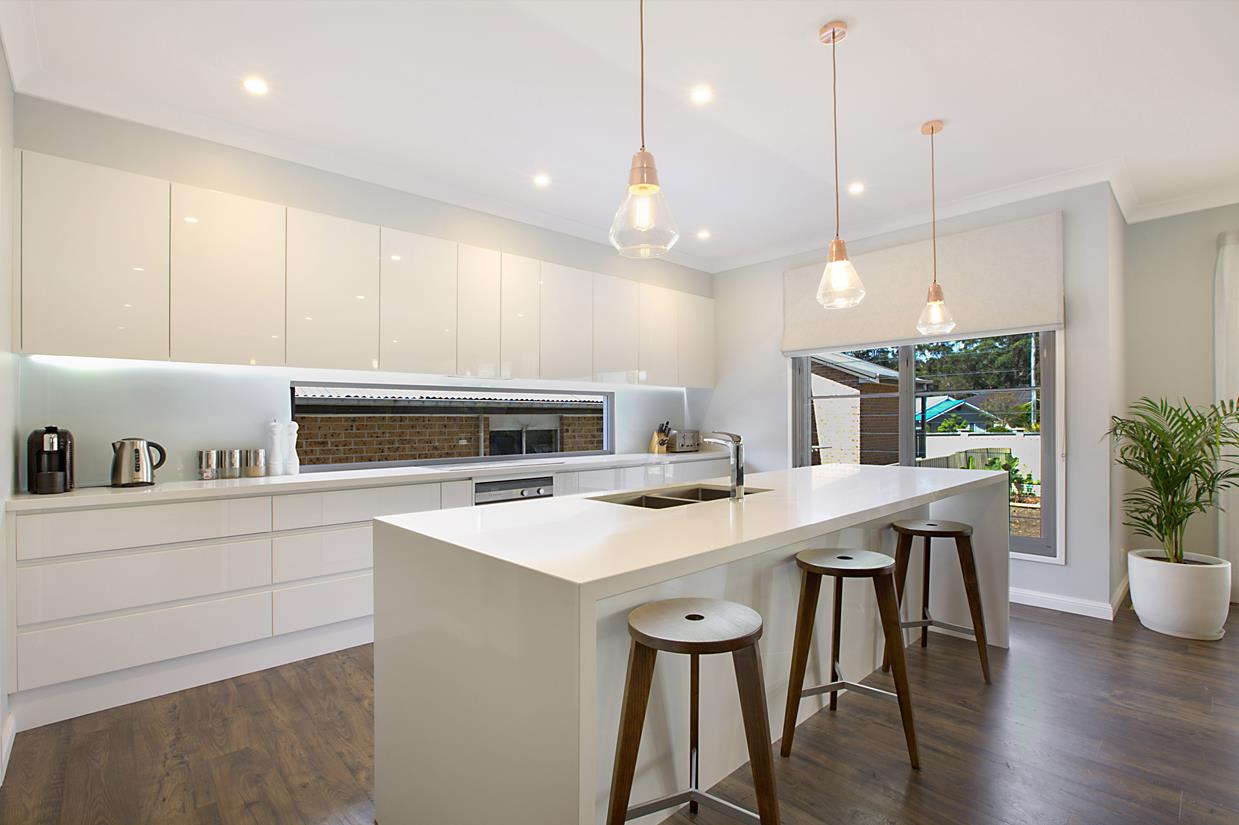
Designing and building your brand new kitchen is the ultimate foodie dream. Not everyone is lucky enough to do it, but if you’re embarking on building your own home or renovating, here are some do’s, don’ts and design tips to consider.
Photo by Tiffany from Encapturelation Property Marketing
Hide the microwave
Hide the microwave
My microwave and I have a love/hate relationship. I love the convenience of being able to zap something, but I also feel a little guilty each time I use it. I’m sure it’s killing all the nutrients and probably adding some sort of radioactive essence to my food, plus it’s not the most attractive appliance around. So either hide it down low out of eyesight or give it a home in the walk in pantry. I had the shelves in the pantry custom made so we could fit a microwave on it and allow some space to place the piping hot plates that come out of it.
Think big – you’ll need it
Give your kitchen as much room as you can. Kitchen’s are an investment in your property and a key feature of resale. If you’ve got an island bench, make sure you can fit 2 people side by side between the island and countertop. Trust me, once you build your dream kitchen, everyone will want to get in there! Our gap measures 1.42m and it’s just perfect.
Oh how I love my induction cooktop
I still can’t get over how quickly my big pot of water boils. I’ve just bought a giant wok for my induction cooktop and because it has a large base it stir-fries with great heat. The only problem is you have to train yourself not to pick up the pan and do the ‘Jamie Oliver toss’. Tricky to do when you’re in the throes of stir frying, but you’ll scratch the glass and upset the magnets underneath. We bought a Fisher and Paykel unit and so far so good.
Take a seat
If you’re going to put in an island bench or breakfast bar, make sure people can actually sit at it without getting their knees crunched or thighs squashed. I’ve never understood the counter overhangs pretending to be breakfast bars. Who wants to eat their breakfast from half a metre away because they can’t get their legs underneath? If you’ve got the space, work out the best sitting height, then find a stool to match. We found ours at Zanui. I rejected many beautiful stools because they were just too tall. Resist the temptation to buy based on looks alone and think of the people who have to sit in them.
Drawers, drawers and more drawers
Cupboards are out, drawers are in. And so they should be. They can be as deep as you like and it’s so much easier to find what you’re looking for. One tip, spend the money to get the inserts. I regret only getting one cutlery insert and now I have a second draw where I’m attacked by tongs, whisks and can openers each time I venture in. Most drawers are double size, so if you think you can get cutlery inserts to fit aftermarket, good luck!
Walk in Pantry – My woman cave
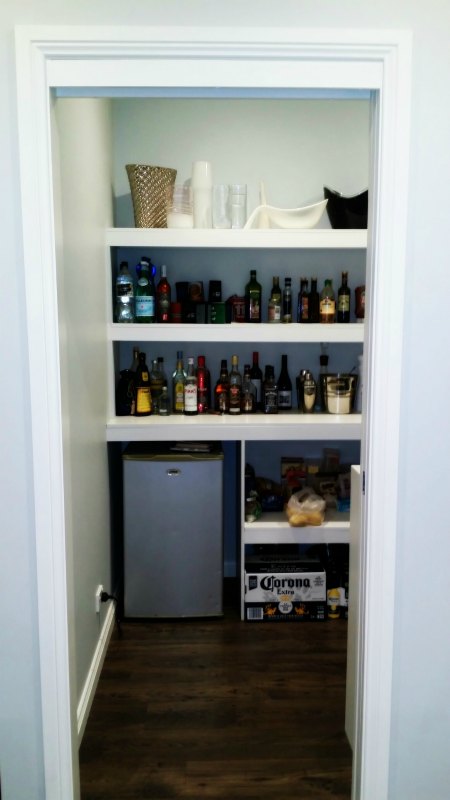
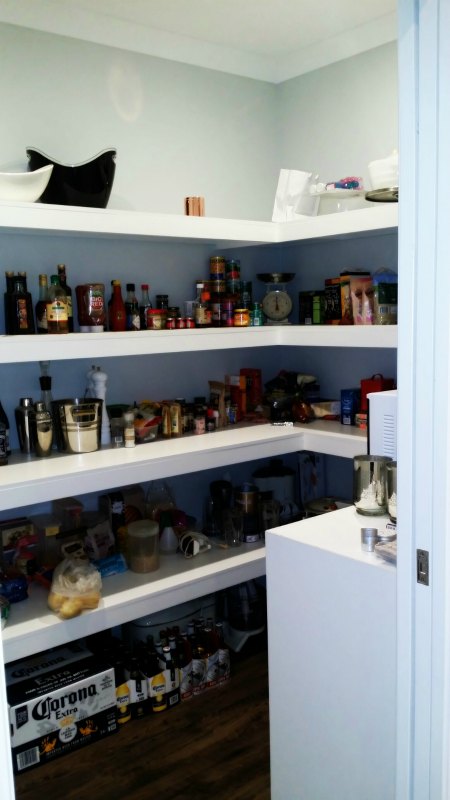
What I love the most... is my walk-in pantry, or as my friends call it ‘Coles Express’. It’s so big it could double as an extra bedroom. I know, it’s a luxury, but if you’ve got the space, you’ll never regret it. Think of it as an investment for resale. And I don’t think you could ever say it’s too big as you’ll always find more things to buy and store. My biggest tip is to tier the shelving. Have a deep one almost like a benchtop then more shallow ones above. I also made sure the shelves were at a height that I could reach everything. Ok, so I can’t quite get to the top one, but 4 out of 5 is fine. I did fight the urge to upgrade it to a butler’s pantry complete with a sink, but for the cost of the additional plumbing, I couldn’t help but think the main sink less than 2 metres away would be sufficient.
Remember to add powerpoints for things like the microwave, bar fridge or chest freezer. Even if you don’t have the need now, it’s easier to get it done before the build/renovation is complete. Once you have a big walk-in pantry, you can buy goods in bulk (that will help counter the costs that you spent on the new kitchen).
Feature lights – How low should they hang?
We measured 72cm to the bottom of the lightbulb
I searched the internet high and low for some sort of guidance on this. And looked at so many images to work out what looked good and what didn’t. Too high up and they look like a kitchen version of ‘Harry High-pants’. Too low and you’re constantly dodging them to keep eye contact with guests. Zac and our electrician were no help to me on this one. But I think I got it pretty right. Working from the top of the bench top, we measured 72cm to the bottom of the lightbulb (the feature part). Just a warning though, no matter where you put them, husbands will always manage to bang their heads on them.
Go big on the benchtop space
If you really love cooking then you’ll need width as well as length. So make your island benchtop as wide as you can so you can roll out that pasta or pastry with ease. I went for a Caesarstone benchtop, mainly for the colour, but also because it’s cold to work with. Whilst it is white and I’m a little OCD when it comes to hunting down crumbs, to get the full white look kitchen it is worth it.
Lighting and power – Plan, plan and plan again
Deciding where each powerpoint and downlight should be placed is a bit of a science really. I took my plans down to the local printer and got the A3 sheets laminated. I used white board markers to plot where each powerpoint and downlight should go. If it wasn’t right, I would just wipe off all the marks and start again until I was happy with the final plan.
One thing to remember is, if you’re planning on putting powerpoints in the sides of the island bench, make sure there is enough room on the other side. Our failing was that the dishwasher was butted up against one of the sides and a drawer unit on the other, so there was no room to put the powerpoint box. Disappointingly, we had to hide an extra powerpoint under the sink to give the island it’s own powerpoint.
Get to know your sink
2 bowl kitchen sink
Looking back, this is the one thing I would change. With the luxury of a dishwasher, the only things I wash in the kitchen sink are the big pots and pans. I now curse the sink each time I try and wash my giant wok in one of the two bowls of the sink. I’m constantly bashing the pan against the centre separator and spilling water out onto the bench as I try and turn the pan around under the running water.
Final thoughts
Take your time to plan your dream kitchen - keep in mind how you plan to use the space and what will add value to your property, if the time comes to sell. Do your homework, ask lots of questions and get a kitchen that you inner-Foodie will appreciate for years and years to come.
Credit where credit is due:
Main photo by Tiffany from Encapturelation Property Marketing
This beautiful home was built by Coastal Constructions
Kitchen by HK Joinery Design